Overnight Cinnamon and Orange Focaccia Bread
I LOVE making Focaccia bread. The first time I made it, the rise wasn’t what I hoped for but after lots of attempts and tweaking of recipes, we’ve landed on something special. This “sweet” version is a marriage between a cinnamon roll and a cinnamon bread. The texture is so light and airy and is honestly very simple to make. This is perfect for breakfast, brunch, or your next holiday function!
Overnight Cinnamon and Orange Focaccia Bread
- Prep Time
20 min
- Cook Time
30 min
- Total Time
12 hr
- Servings
9-12
- Difficulty
Medium
Ingredients
INGREDIENTS
- 2 ¼ tsp yeast (1 pack = about 2 tsp)
- ½ tsp sugar
- 3 cups warm water
- 1 tbsp melted butter cooled
- 5 1/3 cup bread flour (do not use AP flour)
- 1 tsp salt
- 4 tbsp melted butter divided (2 for overnight container, 2 for baking dish)
TOPPING
- 1 orange zested and juiced
- 2 tbsp butter melted
- ½ cup brown sugar
- 2 tbsp cinnamon
GLAZE
- 1 cup Powdered sugar
- 1 tbsp orange juice
Instructions
- In a stand mixer fitted with a dough hook, add the yeast and sugar. Top with the warm water, cover, and allow to sit and get bubbly for 10-15 minutes.
- With the mixer on low, add the butter. Add in 1 cup of flour at a time, allowing each cup to incorporate before adding the next. You might need to scrap down the sides of the bowl with each addition. Once all 5 1/3 cups have been added, add the salt. Turn the mixer up to medium-high and allow it to mix and knead the dough for 8-10 minutes. The dough will be very sticky.
- With the 2 tbsp of butter, thoroughly butter your container that the dough will be resting in overnight. Transfer the dough to the container and refrigerate overnight. I usually just dump the dough into the container, scraping down the sides with a rubber spatula so my hands do not turn into a sticky mess.
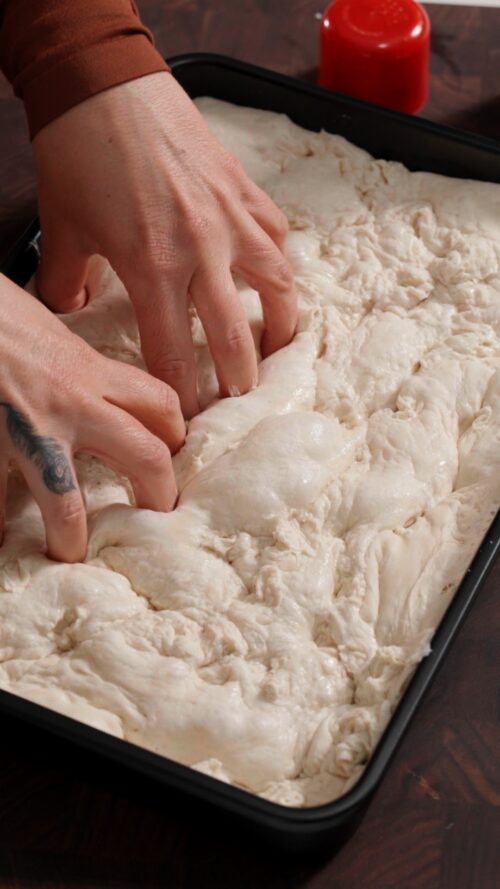
- In the morning or when ready to remove from the fridge, use the other 2 tbsp of butter and grease your preferred baking dish. Dump contents of your container into your prepared baking dish and slightly stretch the dough so it reaches all the edges. You’ll notice the dough began to rise overnight. You will now allow it to further rise and bubble on the counter or in a proofing drawer, covered for the next 1.5-2 hours or until the dough has doubled in size.
- Preheat oven to 450°F and prepare your topping by mixing all topping ingredients in a bowl.
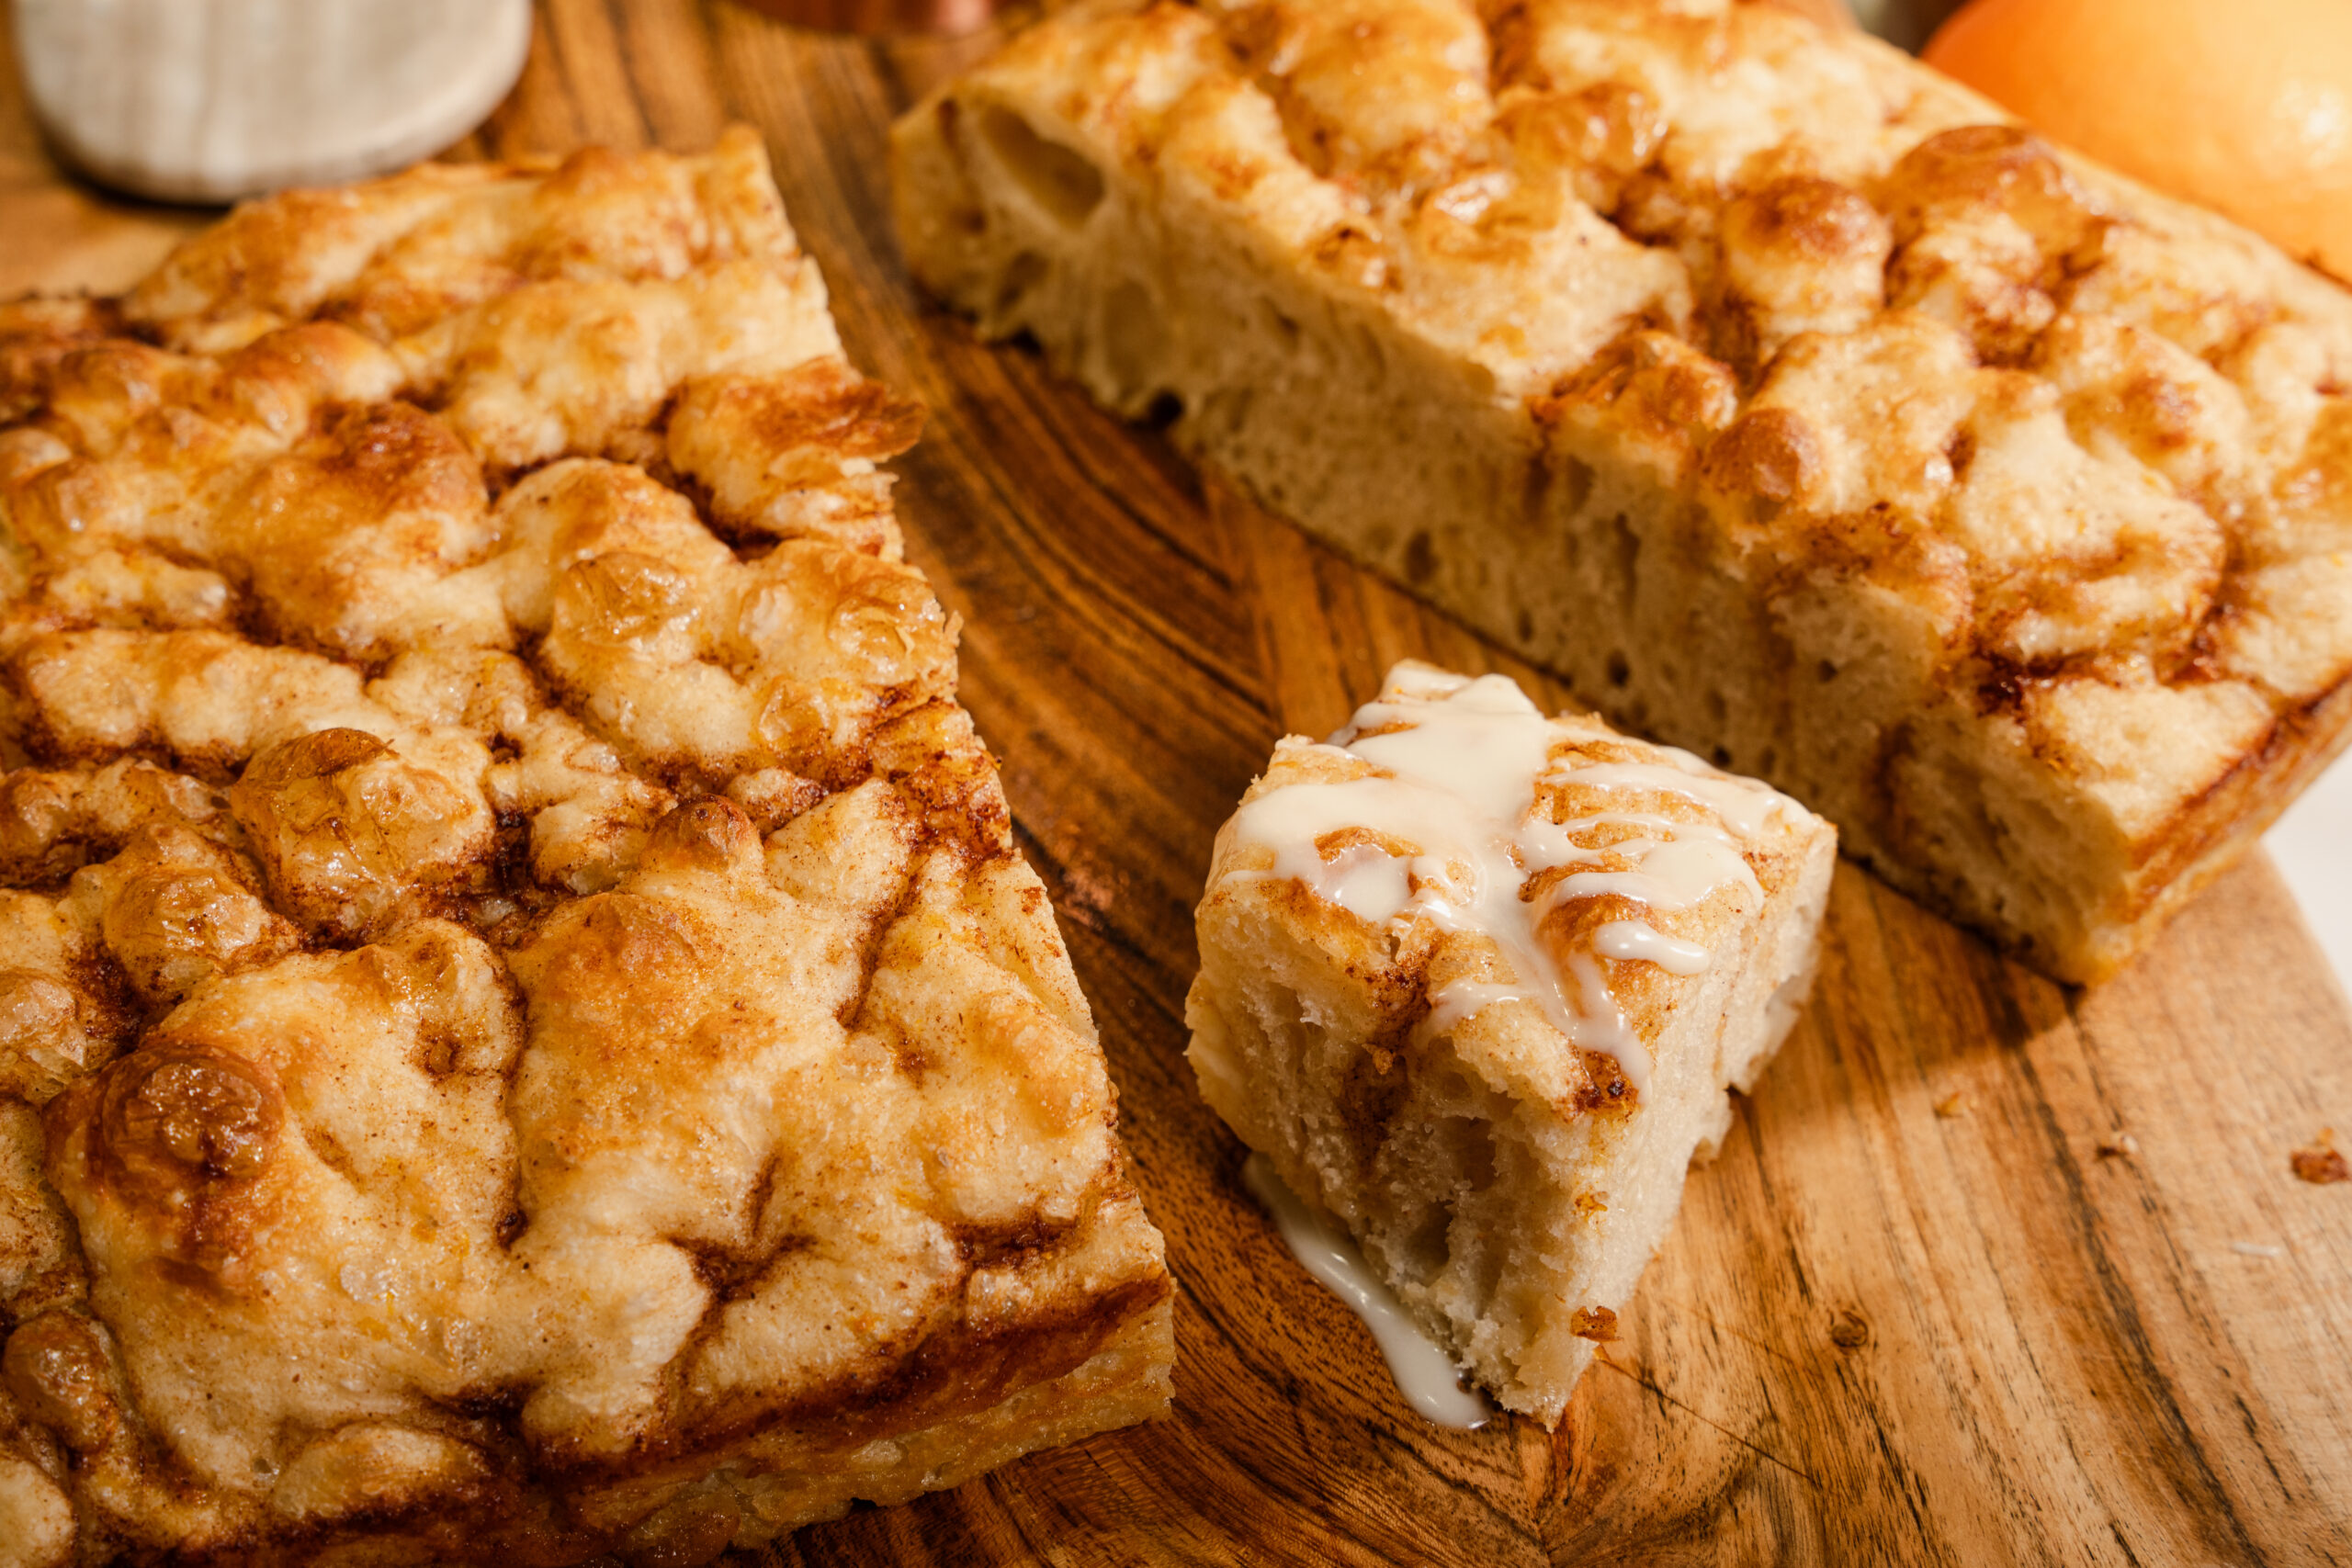
- Now the fun part begins! Slightly grease your fingers (I just spray mine with nonstick cooking spray) and begin to dimple your dough until you have a bunch of little crevices and craters. Now pour your prepared toppings all over the dough. Go ahead and give it one more dimpling with your fingers so that the topping really gets inside of the bread. Bake for 25-30 minutes or until the top is golden brown.
- While the bread is baking, in a small bowl whisk together both the glaze ingredients. You want this thin enough to drizzle but thick enough for it to stay. You may have to add a little powder sugar if too thin or a little juice if too thick.
- Allow the bread to cool slightly- approximately 20 minutes before glazing. Glaze right into the baking dish and allow the glaze to set and harden.
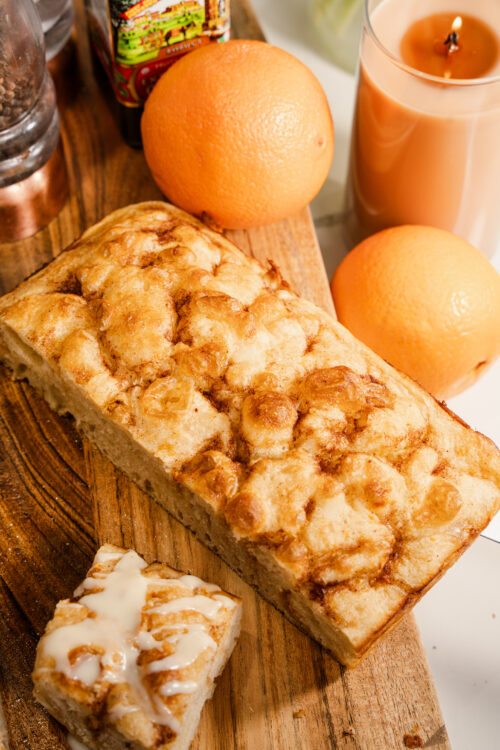
- To serve cut squares of bread and devour. You could even remove the entire loaf and slice it on a cutting board.
Tips
- If baking same day, skip the overnight fridge step and simply allow the dough to rise on the counter or in a proofing drawer for at least 2 hours.
- You could use a regular 9X13 baking dish to bake the dough or you could use a smaller 8×8 dish or round baking dishes. If using something smaller than a 9×13, you might want to split your dough in half as it would be too thick if you used it all in a small baking dish.


My new series Dish with DiSanto, features all the hit and trendy spots in the greater Cleveland area. If you are a foodie, or are just looking for some great places to visit while in Cleveland, then these videos are for you. Hopefully you can find your next favorite spot for friends, family, or date night. Lets get to it!